|
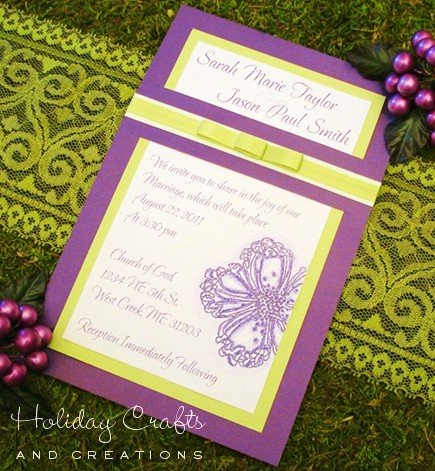
Create Your Own Invitations: Design 2Want to create your own invitations for your wedding, but need some ideas? Then check out this slotted style invitation that we created. We'll show you step-by-step instructions on how to make these invitations. And this design could be used for a variety of wedding styles or themes and could easily incorporate any wedding colors. So take a look at these slotted scrapbook wedding invitations and see what you think!

Materials To Create Your Own Invitations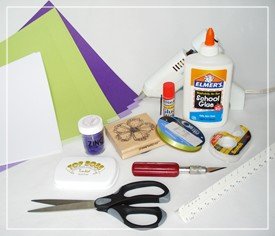
Important Note: If you choose to make a different size than what we have in our instructions, be sure to buy your envelopes first so that you know they will fit! Instructions To Create Your Own Invitations
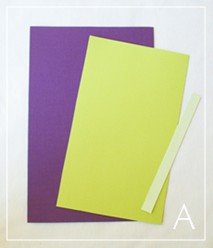
Begin with your three colors of cardstock paper. For our example we are using dark purple, green and light green, so that is what we will refer to, but you can pick any colors to match your wedding theme! First cut the dark purple. This piece should measure 5.5" x 8.5". Then cut out the green at 4.5" x 7.5" Finally, in your light green, cut a small strip that measures 5.5" x 9/16" (this width isn't too crucial). See photo A.
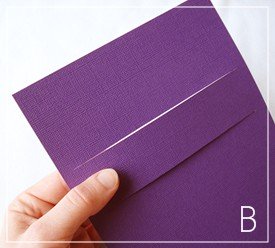
Now set aside your two green pieces for a little while. You will next be cutting the slot on the purple piece that the written part of your invitation will slip through. It is best to make small marks on the paper while measuring, and cut after your done measuring. The first cut should be made horizontally, 2-1/8" down from the top of the paper, and the second cut should be made horizontally, at 3-3/8" down from the top. Be sure to leave about ½" on each side of these cuts. You don't want to cut all the way across the paper or your invitation will fall apart! See photo B.
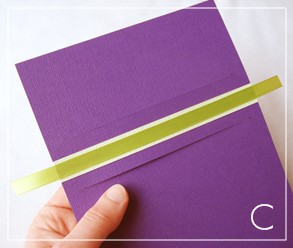
Next glue down your light green strip across the middle of the slot you cut. Then cut a piece of your ribbon that is about 7 ½" long. Glue this down the center of your light green strip, leaving about 1" extra hanging off both sides. See photo C. Once this has had a few minutes to dry, go ahead and glue these tail ends down around the back of the invitation.
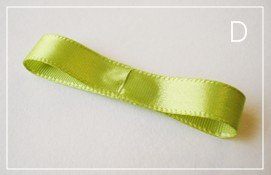
You will now be making the small bow for the center of the ribbon. Start by cutting a 4 ¼" piece of ribbon, and a 1 ½" piece. Get your hot glue gun warmed up! Now on the longer piece of ribbon, you will want to fold the two ends over so that they meet in the middle. Then use your hot glue gun to glue these in place. See photo D. Try to use as little glue as necessary, so that you don't end up with a big lump, as hot glue can easily do.
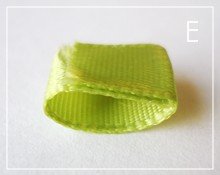
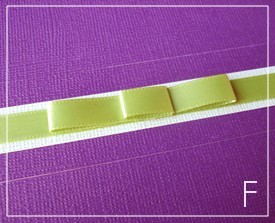
Now do the same idea with the smaller piece of ribbon, only you want to overlap the two ends, and glue them to each other, rather than glue them down to the center of the ribbon. See photo E. Now all that's left to do is glue the first larger piece onto the center of your invitation, and glue the little piece in the center of that (overlapped side down). See photo F.

Next you will need to print out the wording for your invitation. This needs to be done in an area that is 4" x 7". Be sure to put your names very close to the top of the invite, and then leave about 1 ½" of blank space. This is where the invitation goes through the slot. Also arrange your wording so that it leaves a blank space to put your stamped image.
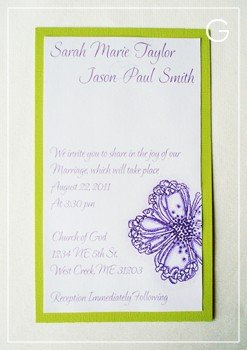
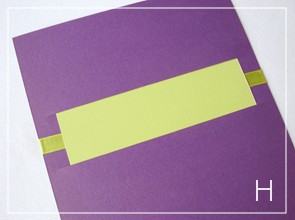
The next step is to create and emboss your stamped image on the invitation. For a tutorial on how to do this, please visit our Embossed Stamps page. An optional idea is to then color in the stamped image with colored pencils or markers as we did in our example. Then simply glue or tape this down in the center of the green piece of cardstock. See photo G to get an idea of how this all looks. Now all that's left to do is slide this piece through the slot and anchor it down to the purple piece with a little glue or tape. As you can see in photo H, the back of the invitation also turns out looking nice, as you can't see the cut ends of the ribbon.
Your invitation is now complete! For more homemade wedding invitation ideas or other DIY wedding ideas, click the link below. Return to Wedding Crafts from Create Your Own Invitations
Carolyn Says: maria Says:
|


