Halloween Art Projects: Clay Candy Corn
If you have been looking for some fun and easy Halloween art projects to do, these cute clay candy corns are a great idea! We will show you how to make them, and then how to make them into Halloween earrings, buttons, and necklace pendants. You could also leave them plain and use as little decorations!
Note: If you have small children, this may not be the best project for them. You would want to make sure they don't mistake these clay candy corns for the real thing!
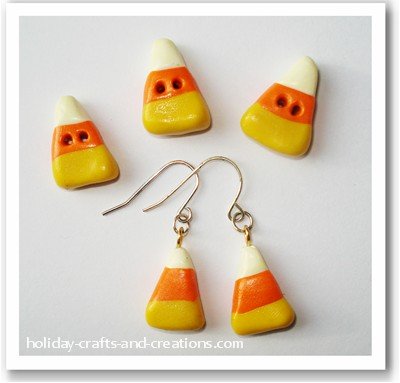
Materials For Halloween Art Projects:
Clay Candy Corn
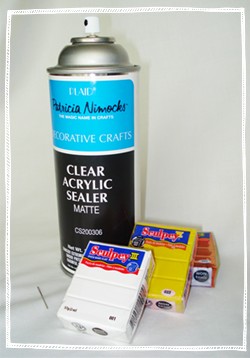
What You Will Need:
Polymer clay in white, orange & yellow
Needle or pin
optional: Clear acrylic sealer

Instructions for Halloween Art Projects:
Clay Candy Corn
Step 1:
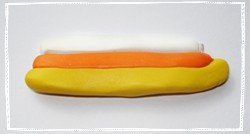
First, roll out a ball of each color clay until you have a roll that is a little over 1/4" wide. A longer roll will make more candy corns, so if you want to make the roll longer, simply add more clay and roll it out again to about 1/4" wide.
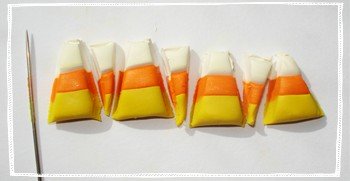
When you have all three rolls and they are about the same length, smoosh them together in the order: white, orange, yellow. See the picture above.
Step 2:
Now take your pin or needle and slice through the clay to cut out the candy corn. Cut at an angle to make each piece. As you can see in the picture on the right, there will be small pieces between each candy corn that will be wasted. You could make these pieces bigger and make them into candy corn too, however the colors will be backwards from a real candy corn, so this part is up to you.
Step 3:
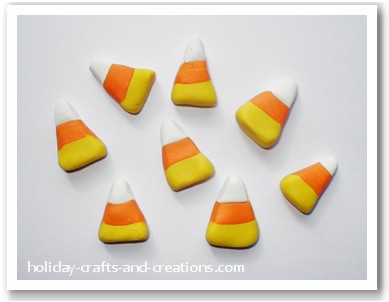
The final step is to smooth all the edges and round out the candy corn. Work with each candy corn until it is nicely smoothed out, and then it is finished. Now if you are using these clay candy corns as decoration only, you may now bake them according to the packaging. We gave ours about 10 minutes at 275F and they came out fine. Once they are cool, you can spray them with the acrylic sealer to give them a shiny finish!
However, if you want to make them into something else, continue reading and Don't Bake Them Yet!
Buttons
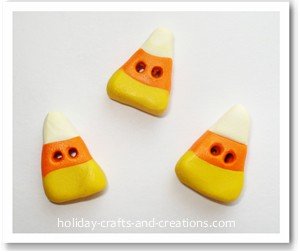
To make these cute Halloween art projects into buttons, simply poke 2 holes in the center of each candy corn. However, it is important that you make holes big enough for your needle to fit through when you are sewing it down later. There is nothing more frustrating than spending all that time on the cutest button and then not being able to use it! Sadly we know from experience!
Once you have poked the holes, then bake and complete as mentioned above.
For a cute idea that uses these buttons, visit our
Mini Halloween Banner
page.
Earrings
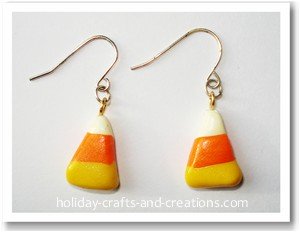
Making a set of Halloween earrings is very easy, but you will need a couple additional materials. You will need eye pins, which can be found at most craft stores, and you will need earring hooks or "ear wire" which would usually be found in the same section with the eye pins.
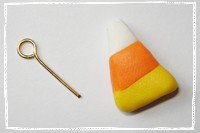
First, you will probably need to trim the eye pin with wire cutters so it is short enough to not poke out the bottom of the clay candy corn. You can see in the picture about how short they should be trimmed so they don't poke out the bottom.
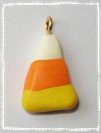 Now poke the eye pin straight into the top of the candy corn. Be sure that the pin is not angled at all, or the pin might poke out the side. Also keep in mind which way you want the eye of the pin to be facing, so when it is on the earring the candy corn faces the front and not the side. This will depend on the earring. As you can see in our case, we wanted the eye of the pin to face side to side. Once the pin is in place, gently press the clay around it to make sure it is secure.
Now it is time to bake the candy corn and finish with the sealer as mentioned above.
Once the pieces are baked and complete, work them onto the ear wires. This may require needle nose pliers to open and then close the wire rings that come with the ear wires.
Necklace Pendant or Beads
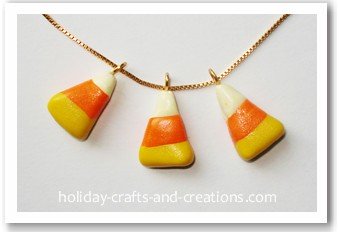
A third idea for these clay candy corns is to thread them onto a necklace as a pendant. One option for doing this would be to put an eye pin into the top as explained above. This will give them a more professional look, but you have to be sure that the eye in the pin is big enough to thread onto the necklace or chain.
If not, you can make the candy corns into beads very easily by poking a hole through the side of the candy corn. Poke the hole near the top of the orange layer, but not in between the white and orange layer, as this may cause the two colors to pop apart more easily. Again, make sure the hole is large enough for the necklace you will be using to fit through.
Once this is done you can bake and finish the pendant as explained above.
We hope you have enjoyed these Halloween art projects and variations, but feel free to think up more clever and creative ways to use these cute clay candy corns! For more Halloween art projects and craft ideas, please click the link below.
We also have many more polymer clay tutorials for all the other holidays! So be sure to check them out too!
Return to Halloween Crafts from Halloween Art Projects: Clay Candy Corns


 Now poke the eye pin straight into the top of the candy corn. Be sure that the pin is not angled at all, or the pin might poke out the side. Also keep in mind which way you want the eye of the pin to be facing, so when it is on the earring the candy corn faces the front and not the side. This will depend on the earring. As you can see in our case, we wanted the eye of the pin to face side to side. Once the pin is in place, gently press the clay around it to make sure it is secure.


