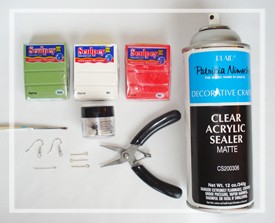
Optional:White Pearl Ex and paintbrush (To give the clay shimmer)
Instructions For Homemade Valentine Ideas:
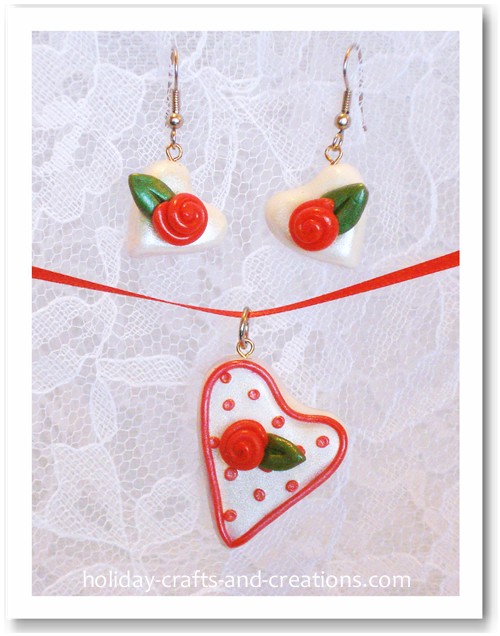
Homemade Earrings and Pendant
Step 1:
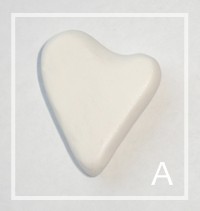
Begin by conditioning the clay until it is pliable enough to work with. TIP: It is a good idea to wash your hands before working with the clay (white clay especially) as dust and fibers easily get into your clay when working with it. Once your clay has been conditioned, roll a ball of your white clay that is about 3/4" to 1" in diameter. Then begin to flatten out this ball, and form it into the shape of a heart. Make the heart at most 3/8” thick. You can make the heart even on both sides, or a little crooked like we did. See photo A.
Step 2:
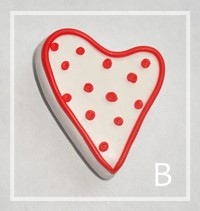
Next you will be working with the red clay. Kneed and condition the clay, and then begin to roll it out into a "snake" until it is 3-1/2" to 4" long. Then begin to place this clay around the border of your heart. It is best to start and end at the bottom point of the heart so the seam is less noticeable. Press this border in place gently, but firmly enough so it won't move around and come off.
To make the dots, roll about 12 very tiny balls of red clay. They should be no larger than 1/16" in diameter. Place them on the heart wherever you would like, and then press each one down using the head of the pin. This also creates a little dent in each one. See photo B.
Step 3:
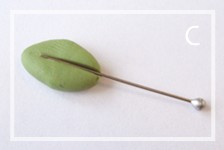
Now it is time to create the cute little flower for the center. Begin by rolling a green ball of clay that is slightly less than 1/4" in diameter. Then flatten it out a little and shape it into a rounded diamond shape. Then take your pin and create a crease in the center of the leaf. See photo C.
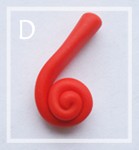
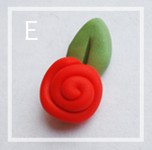
To create the flower itself, roll a ball of red clay that is 3/8” in diameter or slightly smaller. Begin to roll out the ball into another “snake” that is slightly tapered. Flatten out the larger end just a little. Then begin to roll up the piece of clay starting at the smaller end. See photo D. Roll up the flower until you think it is big enough and pull off any extra clay. Then press the flower firmly but gently onto the leaf. See photo E. You want to make sure they stick together, but you also don’t want to smash your flower! Then finish the pendant by pressing the flower onto the center of the heart.

Step 4:
Next you will be making the homemade earrings. You will need two more flowers like the ones you just made in the previous step. Set these aside for now.
Get out your white clay again, and roll two balls that are about 1/2" in diameter. You may want to wash before you do this if you have red coloring on your hands from making the flowers. Then flatten out each of the balls of clay and shape them each into a heart that is about 1/4" thick. Then press a clay flower into the center of each one, again making sure to press them firmly enough so they don't pop off.
Step 5:
Before baking your clay creations, you now need to put an eye hook into the top of each piece. Make sure the eye is facing so that you can look through it if looking straight at the pendant/earring (See the photo at the top of the page).
Also, if you are using Pearl Ex, you want to apply that right now, before baking. To apply the Pearl Ex, simply dip your paint brush into the powder and brush it over the areas you want to shimmer. We suggest you do this over the container of Pearl Ex, so any extra falls back into the container.
Once you are done, place your clay pieces on foil on a baking sheet, and bake according to the package's instructions.
Step 6:
When the clay is done baking and has cooled completely, apply the acrylic sealer according to its instructions. It may need to sit awhile before the sealer dries. Then, using your needle nose pliers, carefully bend the eye hooks open on all three pieces. On the earrings, hook on the earring hooks and on the pendant, hook on the small metal ring. Then close the eye hooks.
Your homemade earrings and pendant are now finished! For more homemade Valentine ideas, please click on the link below.
Return to Valentine Crafts from Homemade Valentine Ideas:
Homemade Earrings and Pendant
Homemade Valentine Ideas:
Homemade Earrings and Pendant