
Polymer Clay Tutorials:
Pencil Holder Craft
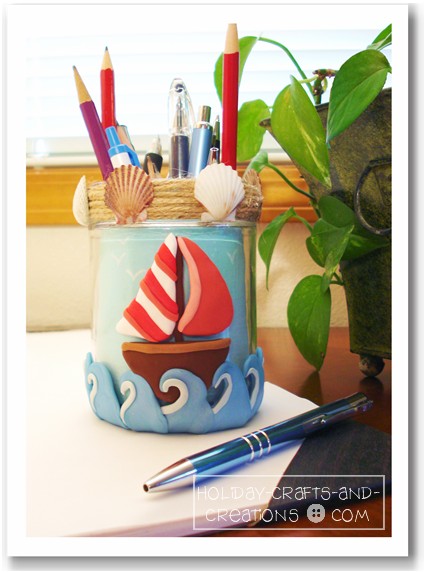
One of our polymer clay tutorials is this pencil holder craft. Hey kids, this year make dad a fun looking pencil holder for his desk. You could be very creative with this project by designing a holder with his favorite things made in clay; like his favorite sport or pass-time.
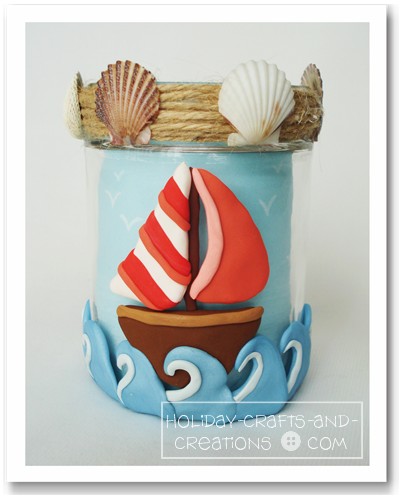
If you like our sailboat design, we have provided the complete instructions so you can create the same look yourself. This is also a great idea if you have been looking for some recycled craft ideas, since this project uses a recycled glass jar.
Polymer Clay Tutorials: Pencil Holder Craft
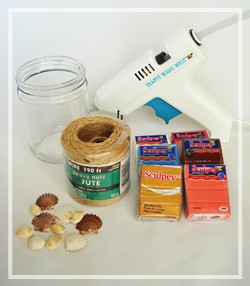
Materials For Polymer Clay Tutorials:
Pencil Holder Craft
Instructions For Polymer Clay Tutorials:
Pencil Holder Craft

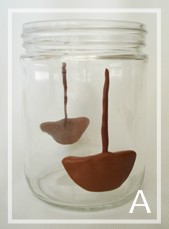
Begin by warming up the brown clay (or whatever color you want the boat to be) and then form two fairly large balls. Form each ball into a half circle type shape, and then flatten out the bottom a little, so it looks like the base of a boat. Then place one on each side of the glass jar, near the bottom. Press the clay on firmly. Note: You will make two of everything so you can make a boat on each side of the jar, but from here, we will just refer to one.
Then roll out a thin, long piece of brown clay and add this to the jar, coming out of the top of the boat (this is the mast). See photo A.

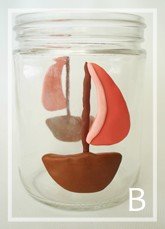
Now in red or coral colored clay, create a large, elongated triangle. Work the clay so that the triangle is curved (see photo B). Place this next to the mast, and press it onto the glass. Then mix some of your red clay with white to get a lighter shade. Roll this lighter shade into a long and thin piece, and place this along the left side of the red sail for added interest as shown in the photo.

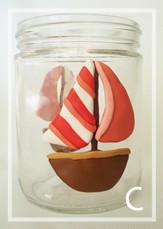
Make another sail similar to the first, only in white clay this time, and not quite as curved. Then roll out thin pieces of red and light red clay and place them across the white sail as stripes. When you are done putting the stripes on, press the sail onto the jar on the other side of the mast.
Also roll out a long and thin piece of light brown clay, and place it along the top rim of the boat (see photo C).

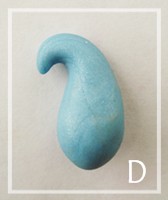
Next you will be making the waves. Begin by rolling a ball of blue clay. Then form it into a tear-drop shape with the top point curled over. Once you have this shape, flatten it out into a wave like shape. See photos D and E.

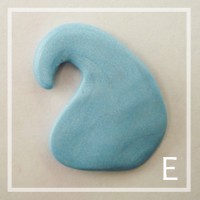
Now place this wave on the jar, starting in front of the boat. Be sure to wrap any excess clay around to the bottom of the jar to help the wave stay attached. Then roll a long and thin piece of light blue clay and place it along the inner side of the wave for a two-toned look.

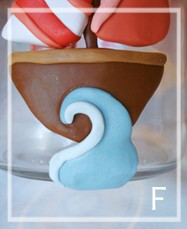
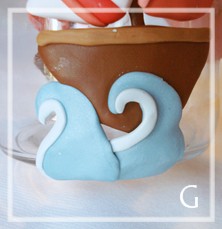
Continue making waves and placing them around the jar as you make them. See photos F and G. Photo H shows you how this should look when your waves are all finished. Also see photo I to see how the bottom should now look. By wrapping the waves all around the bottom and connecting them together, it helps the clay to stay on the jar. As you can see we trimmed the clay so it is all even. This is optional, but does save you the extra clay.

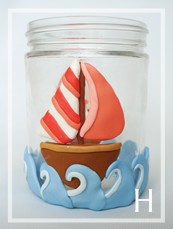
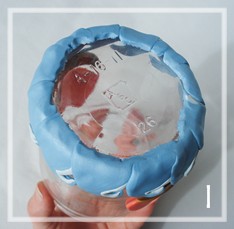

You are now ready to bake your pencil holder in the oven. However, you may want to wipe any fingerprints off the glass before you do. When you are ready to bake, place the pencil holder on a baking sheet and bake for around 10 minutes, or according to the clay's packaging.

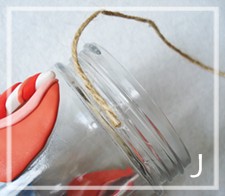
Once the pencil holder is out of the oven and cooled, you can get your hot glue gun warming. You will now be wrapping jute around the top of the jar. Begin by hot gluing the end of the jute to the top. See photo J. Then wrap the jute around and around the top of the jar. You may need to glue the jute down every so often so it doesn’t fall off the top of the jar. When you think that the top is covered enough, glue the tail end of the jute down.

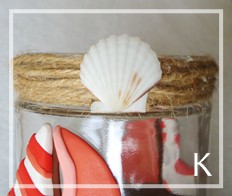
To finish off the look of the jute top, glue your seashells evenly spaced around the top. You may want to place them over the tail ends of the jute to hide any visible blobs of glue. See photo K.

This last step is optional, but gives the pencil holder a more complete look. Take a piece of white or light blue paper and cut a strip that is as wide as the jar is tall, and is long enough to wrap all the way around inside the jar. Then you can draw some clouds or birds if you wish, and place it inside the jar as a background. This will also make it look tidier because you won't see the pencil ends through the glass jar.
You are now done with this pencil holder craft!
We also have other fun clay projects for kids, so if you are interested in more polymer clay tutorials, click the link below.
Return to Father's Day Crafts from
Polymer Clay Tutorials: Pencil Holder Craft

Claudia Says:
It is a creative idea, and easy for our kids!
utkarsh verma Says:
so niceeeee.....n thanks
Qwert Says:
Very pretty awesome idea
anita saha Says:
this is awesome
Skylab Says:
I like this very much, congrats and thank for the great idea
Kim Says:
I really like this, I'm going to make it for my Dad this year!
Polymer Clay Tutorials: Pencil Holder Craft