
Polymer Clay Tutorials:
Shamrock Crafts
One of our fun and easy polymer clay tutorials are these cute little clay shamrocks. We have turned ours into shamrock jewelry, but they could also be used as embellishments on all sorts of things like magnets, frames, pins, or for scrapbooking. So if you have been looking for some easy St Patricks Day crafts or some fun kids crafts, these clay shamrocks would make a great project.
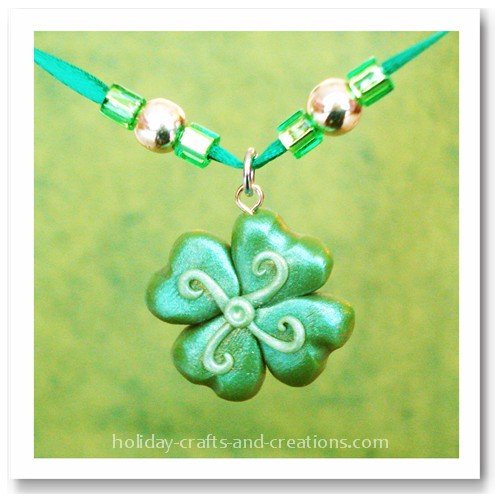

Materials For Polymer Clay Tutorials: Shamrock Crafts
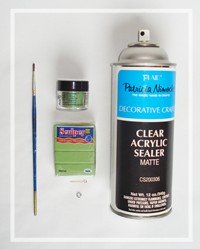
What You Will Need:
- Green polymer clay (1 or 2 shades)
- Acrylic sealer
- Paintbrush
- Eyehook
- Metal ring
- Optional: green Pearl Ex Powder
Instructions For Polymer Clay Tutorials:
Shamrock Crafts
Step 1:
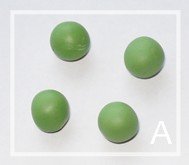
Begin by rolling four balls of clay that are roughly 1/4" wide. You can make them a little bigger or smaller depending on how large you want your charm to be. See photo A.
Step 2:
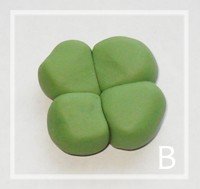
Next, smoosh all four balls of clay together. The tricky part here is making sure that they are stuck together enough to not fall apart, but also not smashed into a shapeless lump! Keep working on it until you get what looks similar to photo B.
Step 3:
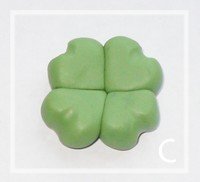
Once you have the four pieces securely molded together, take the side of your paint brush and make a little indention on the end of each petal of the shamrock. See photo C.
Step 4:
If you have a second, lighter shade of green clay, get that out now. If not, you will just use the same green clay for this step.
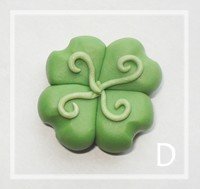
Roll the clay out into thin pieces. Curl the end of one piece into a spiral and place it on one of the petals. Cut off the end so that it stops in the center of the shamrock. Do this for all four petals. See photo D.
Step 5:
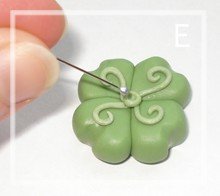
Finish off the look by rolling a very small ball of clay and placing it in the middle of the shamrock to cover the spot where all the ends of the clay meet. Take the end of a small pearl head pin or the end of your paintbrush and make a little dent in the circle of clay. See photo E.
Step 6:
If you would like to coat your shamrock charm in Pearl Ex to give it extra shimmer, use your paintbrush to dust on a coat of it now, before it has baked.
Now place your eye pin into one of the petals of your shamrock. Make sure that you can look straight through the eye of the pin when looking at the front of the shamrock.
Then bake your shamrock according to the package instructions. Once it has come out of the oven and cooled completely, then you can spray it with an acrylic sealer to give it a shiny finish. You may now want to add an extra metal ring to the eye hook depending on what you want this charm to be. We added on an extra ring using needle-nose pliers to turn the charm into a necklace pendant.
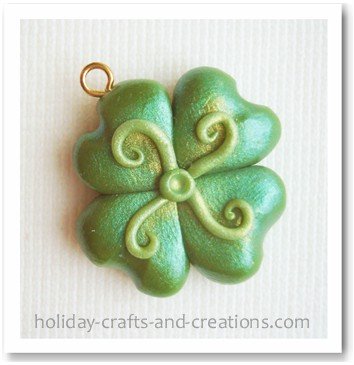
Your shamrock charm is now complete!
So if you have been searching for some fun clay projects for kids or yourself, then try making these cute little good luck charms. They would be great for some easy to make jewelry or other embellishments.
Return to St. Patrick's Day Crafts From Polymer Clay Tutorials: Shamrock Crafts

mike marshall Says:
beautiful
Ursula Caldwell Says:
Thought I check for Good Luck charm patterns for the New Year and found this. Have to try it right away! Thanks and Happy New Year! Ursula
Kelli from Holiday Crafts and Creations Says:
Hi Devorah, thanks for the comment! You should be able to find green polymer clay at any craft store, like Michaels or Joann's (the store or online at Joann.com). We usually use the Sculpey brand of polymer clay.
devorah Says:
i love it!! its cute!!!(i wish i had green Polymer Clay(for a fact i don't have any) what stores carrys it??
guest Says:
i love this craft it is cute and fun and i love it