
Thanksgiving Crafts To Make:
Mini Thanksgiving Banner
If you have been looking for some Thanksgiving crafts to make, then this mini Thanksgiving banner could be a great project for you. This banner is a charming way to give your home a touch of Thanksgiving. This little banner uses simple embroidery stitches that are very easy to do. It is also embellished with some cute leaf shaped buttons. This mini banner is the perfect size to hang on your door, in your kitchen, on your banister, or just about anywhere!
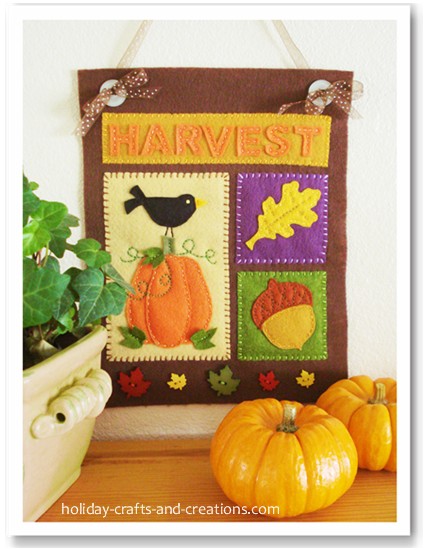

Materials For:
Thanksgiving Crafts to Make - Banner
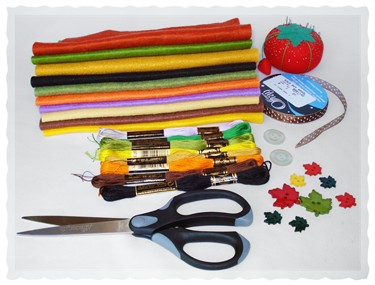
What You Will Need:
Felt: Banner piece - Full sheet brown (9" x 12"), Other felt – gold, orange, beige, purple, olive green, black, yellow, green and rust
Embroidery thread: brown, gold, orange, light purple, olive green, black, yellow, green
5 leaf buttons
2 beige buttons (size: 1" with 2 large holes)
Brown ribbon (at least 42" long, 3/8” wide, shear)
Scissors
Large eyed needle and regular needle
Straight pins
Instructions For:
Thanksgiving Crafts to Make - Banner
Step 1:
Print out the Thanksgiving Banner template (PDF file) and the Pumpkin Template (PDF file). Trace and cut out the patterns with the following felt colors. Also the type of stitches used are listed by each photo.
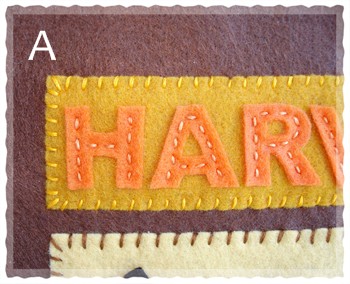
Harvest background – gold felt
Harvest letters – orange felt
Border stitches – whip stitch in gold
Letter stitches – Running stitch in orange
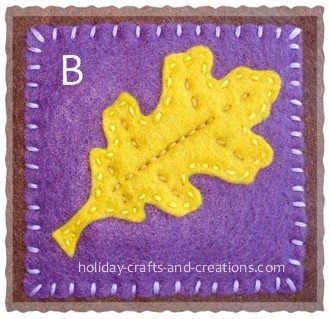
Leaf background – purple felt
Leaf – yellow felt
Border stitches – whip stitch in light purple
Leaf Stitches – running stitch in yellow, backstitch down the center in gold
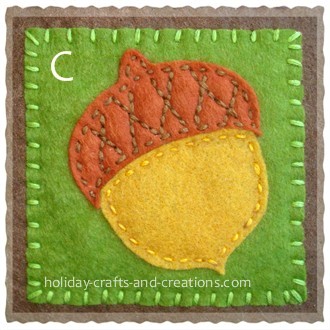
Acorn background – olive green felt
Acorn top – rust or brown felt
Acorn bottom – gold felt
Border stitches – whip stitch in olive green
Acorn top stitches – backstitch for diagonal lines and running stitch along edge in brown
Acorn bottom stitches – Running stitch in gold
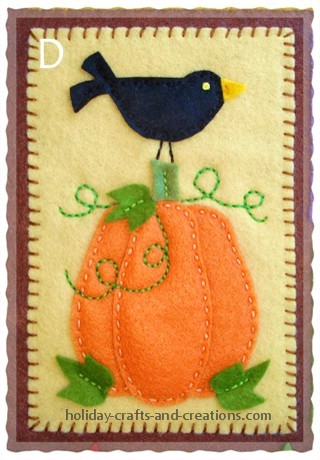
Pumpkin and Crow background – beige felt
Pumpkin – orange felt
Leaves and stem – green felt
Crow – black felt
Beak – yellow felt
Border stitches – whip stitch in brown
Pumpkin stitches – running stitch in orange
Leaves, stem and vine stitches – backstitch in green
Crow stitches – running stitch in black
Crow’s legs – backstitch in black
Crow’s eye – French knot stitch in yellow
Step 2:
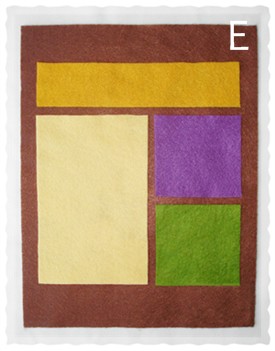
Now that you know what colors of felt and thread to use, cut out all the pieces from the patterns and then evenly space the 4 background felt pieces on the 9" x 12" brown felt. See photo E to see how this will look.
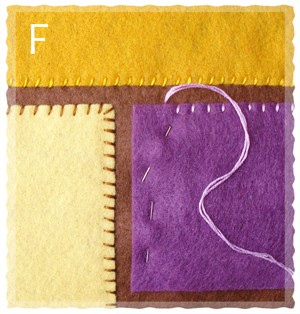
Pin the 4 felt pieces into place so that the felt won't move as you are stitching them onto the brown banner. See photo F. Sew the pieces on using the whip stitch around the edge.
Step 3:
Now stitch the decorative pieces onto their appropriate background using the stitches listed above by each of their photos. Also see the photo at the bottom of this page as a guide.
Step 4:
Sew on 5 leaf buttons across the bottom of the banner.
Step 5:
Sew about an 18” length of the ribbon onto the back of the banner in the two upper corners. Sew it on right behind where each of the beige buttons are going to be, so the buttons will later hide the stitches from sewing on the ribbon.
Thread a large eyed needle with about 12” of the ribbon. Now place a button in one of the corners to hide the stitches and sew it on using the ribbon. To do this, start by poking the needle down through one of the button holes, from the front of the banner to the back. Then poke the needle back up through the other hole of the button so you are left with roughly 6” of ribbon coming through each button hole in the front of the banner. Now simply tie a bow with these two ribbon ends. Repeat this with the other button on the other corner of the banner. Now your banner is complete!
Step 6: Optional
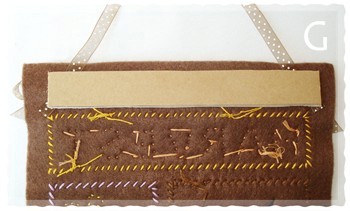
If your banner tends to bend forward while hanging on the wall, you could do this optional step.
Cut about a 1" X 8" strip of cardboard and glue it to the back of the banner. See photo G. Only glue the two ends of the cardboard strip and be sure to place the glue right behind the two beige buttons. This way no glue will show from the front. You could use any type of glue you would like, but we would suggest using hot glue.
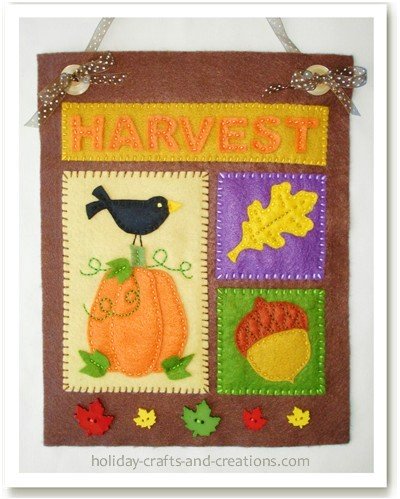
Now your Thanksgiving banner is finished! This cute little Thanksgiving banner will add a charming holiday touch to your home.
For more Thanksgiving crafts to make, please click the link below.
Return to Thanksgiving Crafts from
Thanksgiving Crafts To Make: Mini Thanksgiving Banner

Sandi Says:
LOVE this banner! I made mine bigger and used plaid ribbon across the bottom instead of leaf buttons. I made a sleeve on mine and hung it on a dowel using the same plaid ribbon. I also changed the word from Harvest to Autumn. It is so pretty and fun to make. I'm looking forward to seeing the Christmas banner templates!!