
Wedding Table Settings:
Table Number Lanterns
Feeling crafty and want a do-it-yourself idea for your wedding table settings? Well, these lantern style table numbers are definitely a great DIY wedding project for the crafty bride and they are also very inexpensive to make. And by making some of your own wedding table settings like these table numbers, you would not only save money but also impress your guests. So if you're looking for some wedding reception table ideas that you could do yourself, why not try making these elegant table number lanterns!
Wedding Table Settings: Table Number Lanterns
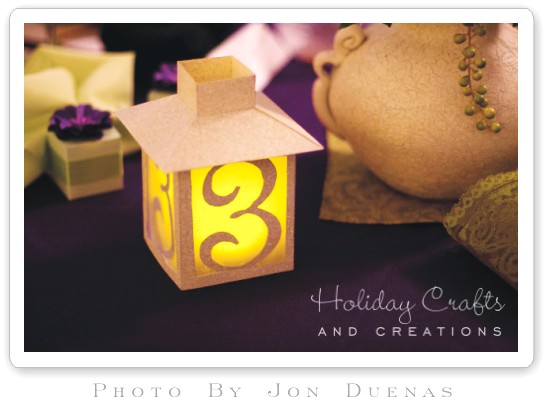


- Lantern template
- Thin cardboard (cereal boxes, etc.)
- X-acto knife or box cutter
- Scissors
- Cutting block
- Vellum paper
- Cream or white spray paint
- Stone texture spray paint (optional)
- Pencil
- Hot glue gun
- Small battery or LED candles (NOT real candles)
Note: These lanterns should NOT be used with real flame candles, since they are made of cardboard.


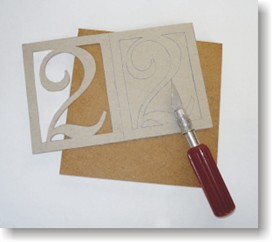
Begin by printing out the lantern template. Trace and cut out the roof and roof strip. Score the corners of the roof as indicated on the template in light grey, and also score the three lines on the roof strip. Concerning the number templates, you will obviously need four of these sides for each lantern. If you can find a piece of thin cardboard long enough, you can trace the sides of the lantern (with the number) four times, side by side in a row. However, if you're like us and don't have a piece of cardboard that long, you will have to trace it in two sets of two. The photo below shows one of these sets of two. Cut out the space around the number using an X-acto knife. Use caution for this step! Then score the line (or lines, if you did four in a row) between sides, where the cardboard will need to bend to form a corner.
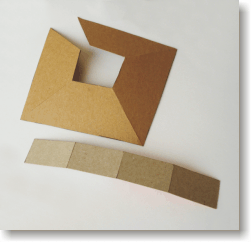

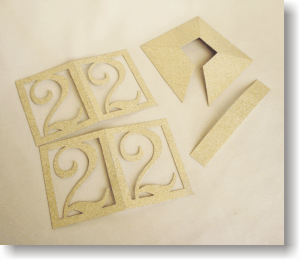
Once you have all the pieces cut out, spray paint the pieces in white or cream. We then sprayed ours with a second coat of stone texture spray paint to give it a nice textured finish. It is not necessary to paint the underside of the pieces, except for the thin strip. This piece should be painted on both sides.

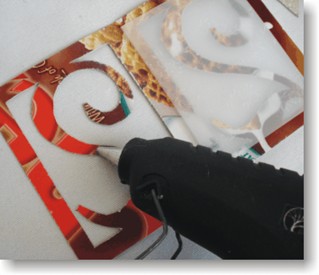
Now cut out rectangles of vellum paper that measures at least 3" x 4". Using your hot glue gun you will glue one piece to the backside of each number. Glue on the backside of the number itself, and also in the four corners. If it seems like it's not enough, you may also want to glue along the sides too.
Once all the vellum paper is in place, it is time to glue the number sides of the lantern together. If you have four numbers in a row this will be very easy, as you only have one corner to glue. But if you're doing it like us with two and two, you'll have to glue two corners. As the photo below shows, it is easiest to lay one side down, glue along the very edge, and then quickly place your other side in place. To make sure the glue adheres, place the cardboard at about a 45 degree angle (or less) so the glue gets stuck, and then swiftly pull it up into a nice 90 degree angle. This whole step is a little tricky, and just takes some experimenting to get the right technique.
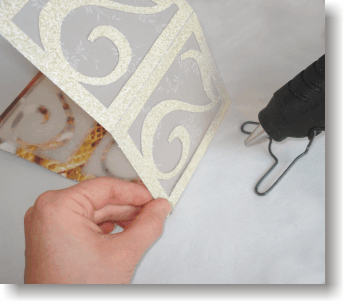

Now it is time to construct the roof. Begin by gluing the strip into a square, folding it at the scored lines you made earlier. Then you will need to glue the roof together. Again, fold the roof at the places you scored earlier, and then bend it so the gap is closed. Then on the underside of the roof, place hot glue along this crack and hold it until the glue sets.
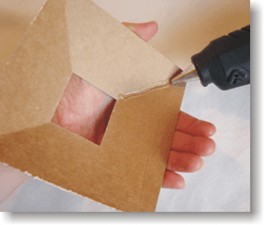
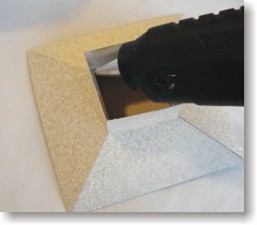
To complete the roof, place the square strip on top of the roof and hot glue it on. It is best to hot glue inside the strip, so the hot glue is not visible on the outside of the roof.

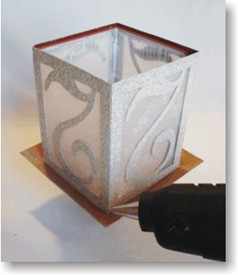
The final step is to glue the roof to the base of the lantern. The best way to do this is to set the roof upside down and then place the base of the lantern upside down on it. Then simply put some hot glue on each of the four corners where the roof touches the base. You probably don't need to glue anything more than that. But if you feel like some places need to be better secured, feel free to add a little more.
Your lantern is now complete!
Note: Be sure to only use battery operated flameless candles, or LED lights.
Wedding Table Settings: Table Number Lanterns
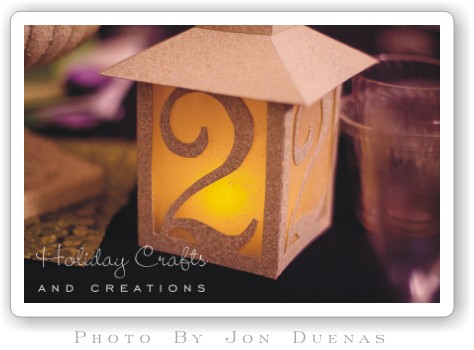
We hope you like this do-it-yourself wedding table settings idea. And if you have been looking into the price of small lanterns, you will know that they are not the cheapest item, and the price can really add up depending on how many you want. So this project is a great way to make your own for very little money. But as you may have already realized, you will definitely have to set aside some time to get it done. And if you are the crafty type and would like some more ideas for DIY wedding decorations, then be sure to click the link below.
Return to Wedding Crafts from Wedding Table Settings

Monika Says:
I love this! I was going to buy little garden lanterns and print black and white pictures of my fiance and myself on vellum paper to make little lantern luminaries for the centerpieces, but this is a great alternative option that will save us some money! I love it!