
Polymer Clay Tutorials:
Leprechaun Art Project
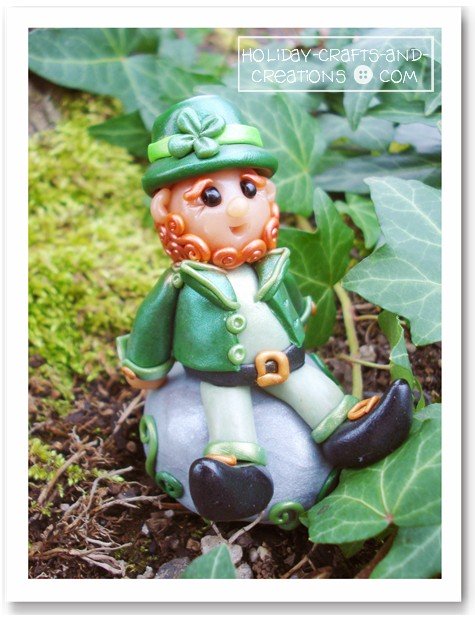
One of our favorite polymer clay tutorials is this cute little leprechaun. If you are looking for a clever St. Patrick’s Day decoration, this leprechaun is quite charming, and would certainly bring the luck of the Irish to your home! He would be a great project to do with your kids, and would be a cute keepsake to bring out every St. Patrick’s Day.
We have provided complete instructions and a list of the craft and floral supplies that you will need to complete this leprechaun art project. We also have some suggestions on how you could display this charming little leprechaun.
Note: This clay leprechaun is a great project for older kids or yourself, but if you need polymer clay tutorials that are a little more kid friendly, then try our shamrock charm.
Look who we found in our backyard just in time for St. Patrick’s Day!

Materials For Polymer Clay Tutorials:
Leprechaun Art Project
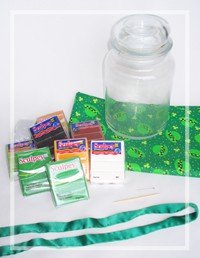
Craft and Floral Supplies You Will Need:
- Polymer clay: Several shades of green
red or orange
beige
grey
black
gold - Two black beads (about 1/8" wide)
- Toothpicks
- Small pearl head Pin
- Pen cap
- Optional:
Glass jar, ribbon, fabric, Pearl Ex powder, acrylic sealer, artificial or real foliage, moss
Instructions For Polymer Clay Tutorials:
Leprechaun Art Project
Step 1:
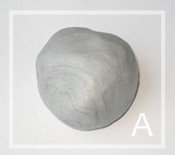
Begin by rolling out a ball of grey clay for the rock. This ball can be anywhere from 3/4 of a block, to the entire block of clay, depending on how large you want your leprechaun to be. You can make the ball uneven in places to make it look like a real rock, but be sure to give it a very flat bottom so it sits without rolling. See photo A.
Now, using a light green clay, roll out two legs that are the same size. Next, roll out two balls of black clay that are the same size, and form each into the shape of a shoe. These can be as big or small as you like. Make them pointed on one end for the toe, and rounded on the other end for the heel. Press these shoes firmly onto the end of each leg.
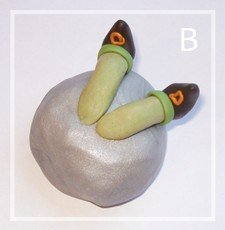
To nicely cover the seam between the leg and shoe, roll out two small pieces of darker green clay and then flatten them out slightly. Wrap one around the end of each leg. This will make cute little cuffs for the pants. Finally, roll out a very thin piece of gold clay, cut it in two, and form two buckles by pressing the clay onto the top of each shoe in a square. This may be a little tricky, so don’t worry if it takes a few tries to form a cute buckle!
You can now press the two legs onto the rock. See photo B.
Step 2:
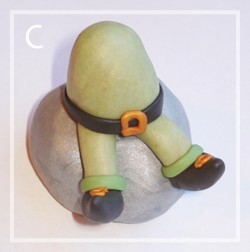
You will next be making the body of the leprechaun. To do this, roll out a large piece of clay in the same shade of green as you used for the legs. You want this ball of clay to be slightly tapered, with the base being wider around then the top part. When you are happy with the size and shape of the body, press it down firmly on top of the legs. You may want to consider using a piece of a toothpick to be stabbed in between the two pieces of clay to help hold the body onto the rock if your clay seems like it isn’t sticking very well.
Then, create a belt using the same technique as you did for the cuffs on the pants. Simply roll out a snake-like piece of black clay and slightly flatten it, and then wrap it around the very base of the body. This will hide the seam where the legs and body meet. Then make another gold buckle for the front of the belt. See photo C.
Step 3:
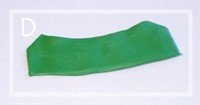
In this step you will make the vest for your leprechaun. This part may seem a little tricky, but shouldn’t be too difficult. Begin by rolling out a large piece of grass green clay. You want this piece to be long and somewhat narrow. Flatten this piece out so it is quite thin.
You can do this either by pressing it with your hands or pressing something flat against it such as a bottle lid. Then, using a toothpick or pin, cut around the edges to make them smooth and crisp. See photo D for an idea of how you want the vest to look.
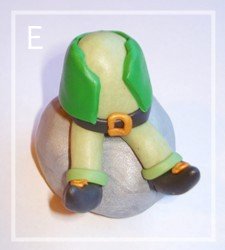
Once the vest is nicely shaped, carefully peel it off your working surface and begin to wrap it around the body of the leprechaun. You may have to pull and stretch it a little to get it to “fit” right. Try to get the bottom of the vest to meet up with his belt all around his waist. See photo E.
Step 4:
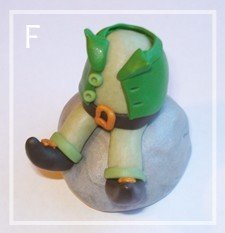
It is time to add some embellishments to his vest! To give him a collar, roll out yet another long piece of clay and then flatten it slightly. Wrap this piece around the top of his vest for a collar. Then, make two small triangles out of the same green clay and place them on both sides of the top of his vest to complete the collar.
For the buttons, place two small light green balls of clay on the left side of his vest and indent the center of each one using the end of a small pearl head pin. Then, on the other side of his vest, use your pin or toothpick to make two indentions for the button holes. See photo F.
Step 5:
You will next be making the arms. To do this, roll two pieces of grass green clay that are tapered at one end. Then roll two balls of beige clay for the hands, and press these onto the end of each arm.
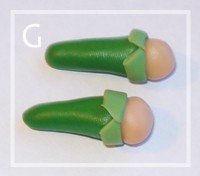
Then you will make a cuff for each arm. To do this, roll out two pieces of clay and flatten them out like you have done a few times before. However, this time you will want to use your pin or toothpick to cut angled ends. Then when you wrap the cuff around the end of the sleeve, the ends will be angled out like a real cuff! See photo G.
Step 6:
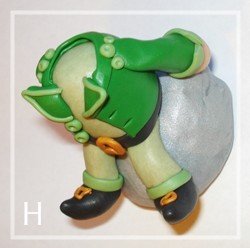
Now it’s time for just a few more embellishments. Roll out a thin round and long piece of light green clay. Cut this piece in two, and then put each piece around the triangular parts of the collar. This outlines the collar and makes it stand out more. Then you could also put about three circles of clay on his shoulder and indent the centers like you did for his buttons. This just creates added flair! See photo H.
We also added a similar small gold button to the cuffs on each sleeve.
Step 7:
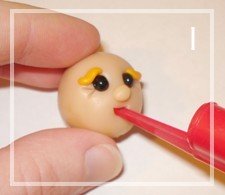
Next, you will be making the leprechaun’s face. Roll a ball of beige clay for the leprechaun’s head. For his eyes, push two black beads into the clay. Using your pin, make two small indentions on the outside of both eyes as eyelashes. For his nose, roll a small piece of beige clay and press it into place. His eyebrows can be made using small pieces of orange or reddish clay above each eye. Finally, for his mouth, we used the end of a pen cap. This creates a small little smile! See photo I.
Step 8:
Next, firmly press the head into place. You may once again want to use a piece of a toothpick to hold the head to the body if the clay feels like it isn’t sticking together very well.
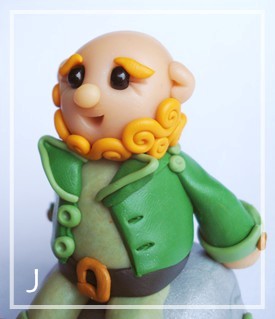
Now you can add his ears. Just take a small piece of beige clay and create a crease in it using your pin or toothpick. Once you have made two, attach them to his head. For his hair and beard, roll out thin pieces of orange/red clay and roll them into “S” shaped spirals. Make as many of these as you need to cover the back of his head and to complete his beard. See photo J.
Step 9:
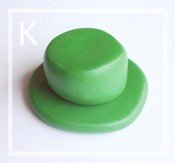
Finally, you will make the leprechaun’s hat to finish off his look! To make the brim, roll a round ball of green clay, and then flatten it out. To make sure it is nice and even, we suggest you use a bottle lid or some other flat surface to smoosh it down with. If you use your hand, it may not be as even as you would like.
To make the top part of the hat, roll a second ball of clay. Create two flat sides by pressing it against your table or working surface. Then roll the clay around the middle to flatten this out. When you are done, you should have a short cylinder shaped piece. Press this piece onto the top of the flat round piece you just created. See photo K.
Now put a band around the brim of the hat. To do this, you will flatten a rolled out piece of clay like you have done with the belt and cuffs. You could also add a small clover by rolling four small balls of green clay, placing them together on the brim of the hat and creating an indentation in each petal with your pin.
Firmly press the hat into place on the leprechaun’s head. You are now done creating the leprechaun. You’re almost finished!
Step 10: Optional
If you would like to apply some Pearl Ex powder to your leprechaun to give him a shimmery look, you should do that now, before he has been baked.
To do this, simply dip a small paintbrush in the color of powder that you would like, and then dust this onto the part of the leprechaun you want. Just be careful to only use it where you want it to be, as the Pearl Ex powder can be hard to get back off of the unbaked clay.
Step 11:
Place your leprechaun on a baking sheet and bake him in the oven according to the packaging instructions. Once he has been baked and has cooled completely, you can coat him with an acrylic sealer if you would like. If you used any Pearl Ex powder however, acrylic sealer is necessary, because the shimmer will rub off over time otherwise.
Your clay leprechaun is now finished!
Here are some fun ideas to display your leprechaun!
Caught In a Jar
Polymer Clay Tutorials: Leprechaun Art Project
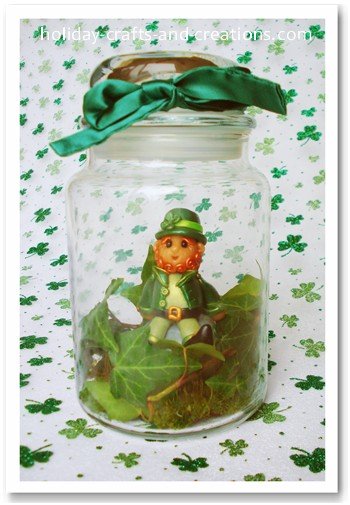
If you would like to display your leprechaun as if he has been captured in a jar, you will need some artificial or real foliage like leaves, moss, and vines. Place some moss in the bottom of your jar and then wrap some vines and leaves in around the center of the jar. Then place your leprechaun in the middle of the jar. Complete the look by covering the lid with fabric or by simply tying a green ribbon around the top of the jar. You can then display the cute little leprechaun you have "caught" for St. Patrick's Day!
Candy Dish
Polymer Clay Tutorials: Leprechaun Art Project
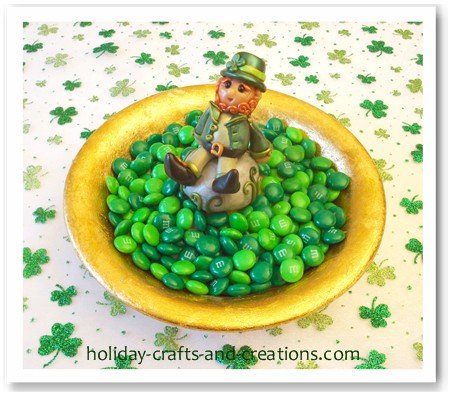
Your leprechaun would look cute in the center of a candy dish as well! To create this look, we used a small paper cup, turned it upside down in the center of the bowl, and set the leprechaun on top. We then filled in around the leprechaun with green candy. This made it look as if the leprechaun was sitting on a rock above the bed of candy. You could also use gold coin candy instead.
For more polymer clay tutorials, click the link below and see our other fun and easy craft ideas.
Return to St. Patrick's Day Crafts from Polymer Clay Tutorials:
Leprechaun Art Project

Evilinha Ramos Says:
Adorei lindo obrigado.(I love it. It's nice. Thank you.)Tina Says:
He is supercuteMaxine Says:
He is gorgeous, has given me inspiration to give modelling ago!! Thanks kellitink Says:
he is so adorable , thanks for sharing him, he brightened my day. oh and Happy Birthday!Kelli from Holiday Crafts and Creations Says:
Thanks for the comment Amy, we're so glad you liked this idea! As for the face, I've also noticed that sometimes beige clay cracks or looks a little grainy. I'm not sure why that is. So glad yours turned out cute though! :DAmy M in Indiana Says:
I had a great time making this --it was the first time I've ever done it, and your directions were super! The only thing was my guy's face got a little grainy when he baked -not sure why, but he is still cute! Thanks!Erika Says:
This is really nice, he is so cute! :)
Polymer Clay Tutorials: Leprechaun Art Project